009 : Cross Probing from Guardian LVS to Expert and Gateway
Minimum Required Versions: Expert 4.10.37.R, Gateway 2.14.0.R, Guardian LVS 4.8.36.R
When users are at the LVS verification stage of their project, being able to cross probe between the different tools can be of great help. This example will demonstrate how cross probing of nets and device instances can be achieved between the Layout Editor tool Expert , the schematic entry tool Gateway , and the LVS tool Guardian LVS .
1. Preliminary steps
In order to run this example the user needs to open an Expert session and choose File->Open to load the project lvs_ex09.eld located in PDK_file\expert\examples . Then open the top cell SWG_LVS using the Cell->Open... menu.
2. Guardian LVS and cross-probing
The Guardian LVS tool has the capability of cross probing nets and instances in both the schematic and layout tool. On completion of the LVS comparison run, the reports generated guide the user on which mismatch are still present between the two netlists being compared.
Many reports allow the user to double click on a net or an instance and have it highlighted in Gateway and Expert to help the debugging process.
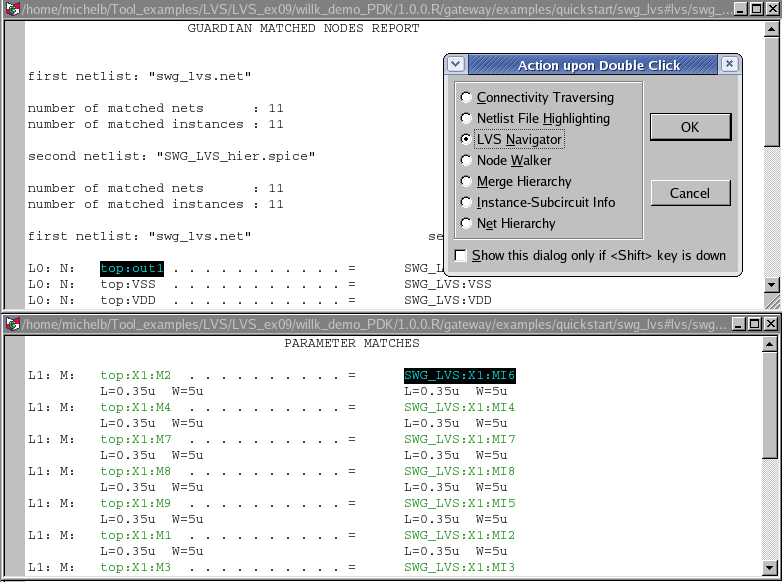
An illustration of the Match report ( MA ) and the Match Parameter report ( MP ) is shown in Figure 1 . When double clicking the net "top:out1" of the schematic netlist, the window titled Action upon Double Click opens. By selecting the LVS Navigator option and pressing OK button, the net or instance will be highlighted in the schematic and the layout tools.
3. Experimenting with Cross-probing
Once all the example files have been downloaded and the preliminary steps describes in 1 are completed the user can follow the instructions below:
- From within Expert , choose Verification->Extraction->Setup , once the Setup window opens, press the Load button and select the file lvs_ex09_ExtractionSetup.lpe located in PDK_file\expert\examples . You may have to remap some path to your local drive.
- Press OK to close the setup window.
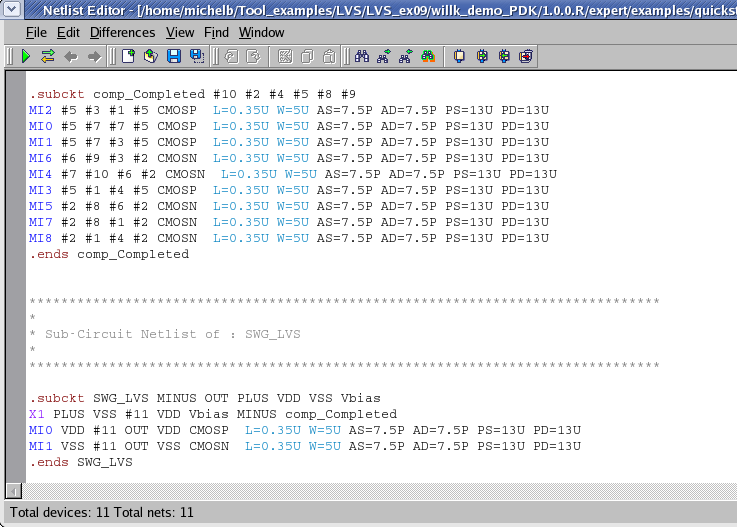
- In the same window, choose Verification->Extraction->Hipex-Net->Run , this should produce a netlist as shown in Figure 2 .
- Close the netlist and choose Verification->LVS->Launch LVS .
- When the Guardian LVS window opens, select Setup->Project Settings... and press the Load button, then browse to the file lvs_ex09_LvsSetting.gpr located in PDK_file\expert\examples .
- Press the OK button of the Project Settings window to close it.
- Then select Action->Launch Gateway , this will open a Gateway session.
- In Gateway select File->Open->Workspace... and browse to lvs_ex09.workspace located in PDK_file\gateway .
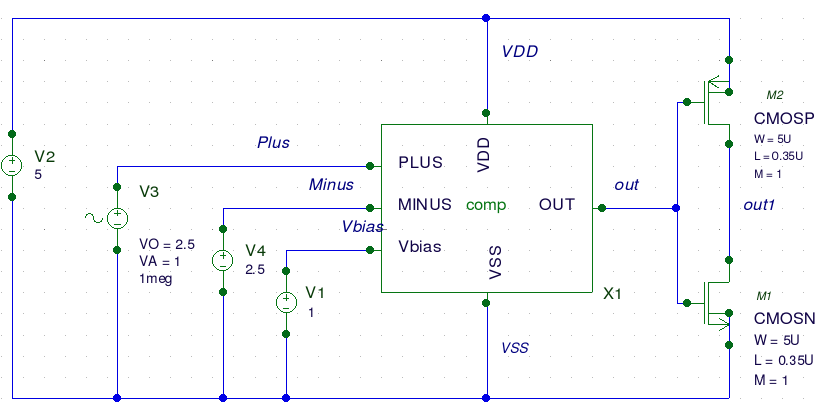
- Choose File->Open->Schematic... and browse to lvs_ex09.schlr located in PDK_file\gateway\example\quickstart .
- The schematic should open in the Gateway window shown in Figure 3 .
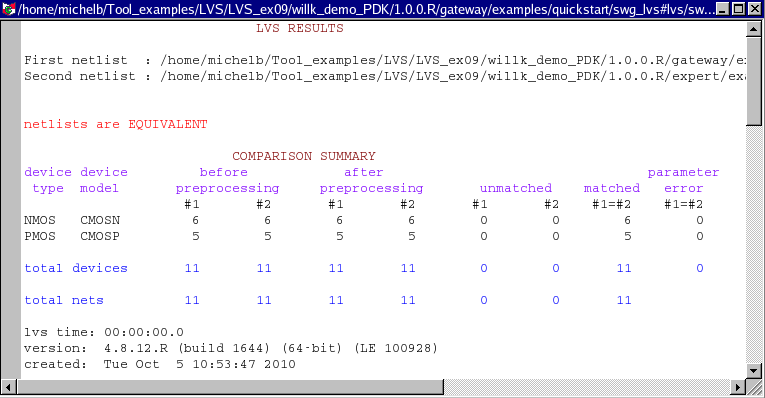
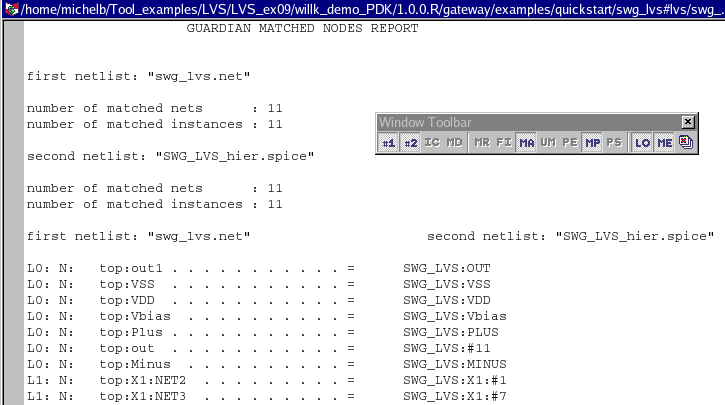
- Go back to the Guardian LVS window and select Action->Run Lvs on completion; the log file should indicate that both netlists are equivalent, see Figure 4 .
- In the Window toolbar select the MA icon, this should bring up the match report as shown in Figure 5 .
- In this report window, double click on the net "top:out1" located to the left column at the top.
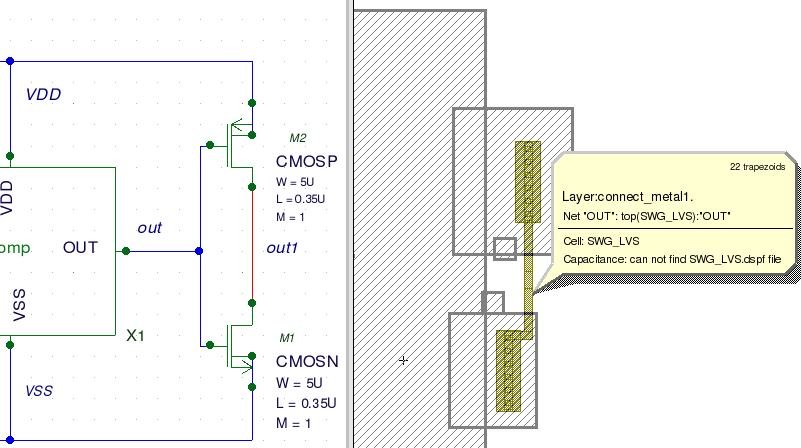
- When the Action upon Double Click window opens, select the option LVS Navigator and press OK .
- Both nets should be highlighted as shown in Figure 6 .
To learn more about the cross probing within Guardian LVS the users can read section 2.3.4 of the Guardian LVS User's Manual ( guardianlvs_users1.pdf ) located in /lib/guardian/4.8.36.R/docs of the Silvaco tool installation area.