010 : Guardian LVS Inspection Tools and LVS Discrepancy Detection
Minimum Required Versions: Expert 4.10.37.R, Gateway 2.14.0.R, Guardian LVS 4.8.36.R
Guardian LVS provides users with many reports on the completion of an LVS run. In addition, the tool has many functions that link these output files (reports) to the two netlists being compared. These functions facilitate the debugging process and browsing of reports.
1.0: Preliminary steps
To run this example, open a Guardian LVS session and choose Setup->Project Setting . Once the Project Settings window opens, choose the Load button located at the bottom of the window and browse to the downloaded file LVS_ex10_LvsSetting.gpr .
Note that the user may have to remap the path to the Netlist #1 and Netlist #2 to their local installation. Then choose the menu Action->Run to launch the LVS run.
2.0: Guardian LVS inspection tools
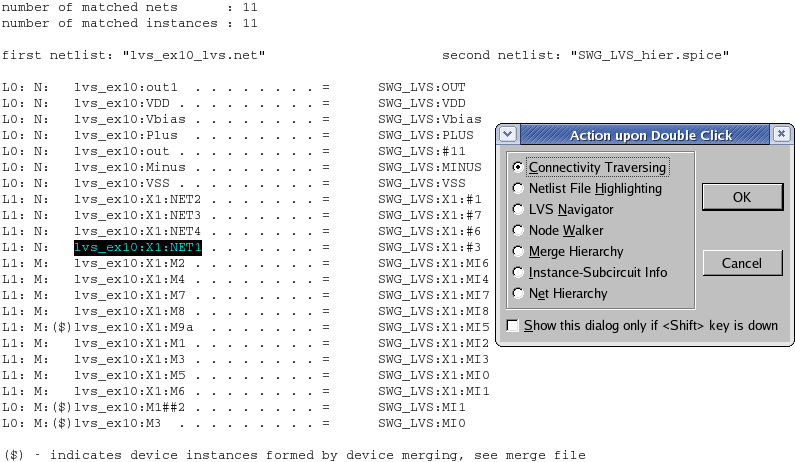
In order to activate the different functions available, the user needs to turn on the Always show "Action" dialog at double click option in the UI Settings panel, accessible through Setup->UI Settings , and double click on a hierarchical name of a device or a net instance in the Match, Unmatch, Parameter Error or Parameter Match report file. The device or nets will get highlighted and the Action upon Double Click panel will open as shown in Figure 1 .
This window offers seven different options to help in the debugging process. They are:
- Connectivity Traversing
- Netlist File Highlighting
- LVS Navigator
- Node Walker
- Merge Hierarchy
- Instance-Subcircuit Info
- Net Hierarchy
The Action upon Double Click panel will also appear, when the user double-click on a name in the Filter or Merge report file. The list of options will vary depending on the file used.
For the Filter file, the window will contain the following options:
- Netlist File Highlighting
- Instance-Subcircuit Info
and for the Merge file:
- Netlist File Highlighting
- Merge Hierarchy
2.1: Connectivity Traversing
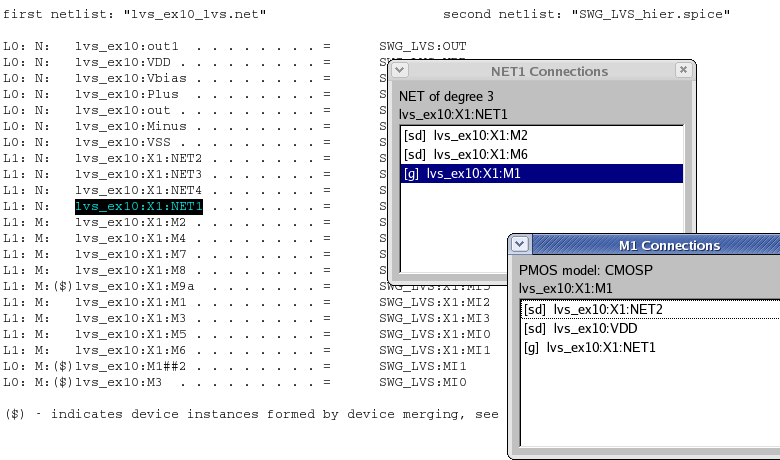
This option will open the Connection Panel and list all nodes to which the selected node is connected. The nets have connections to device instances only, and the device instances are connected to nets. Once the panel opens, double clicking on a neighboring net will open a second panel that will illustrate the connectivity for this new net, and so on. Figure 2 illustrates this function. The net degree in the Connection panel is calculated after any device merging, reduction and filtering that has been performed by the LVS tool.
The terminal names are presented in square bracket ([]). Some of the abbreviations used for the terminal are presented below:
- sd: source or drain ( when the pins are swappable)
- s: source
- d: drain
- g: gate
- bl: bulk
A complete list of abbreviations and more extensive description of this option can be found in the Guardian LVS User's Manual ( guardianlvs_users1.pdf ) located in \lib\guardian\4.8.36.R\docs of your installation area.
2.2: Netlist File Highlighting
This option is rather simple. It allows the user to find a chosen net in the netlist. The corresponding SPICE file will open and the net in question will be highlighted. A bookmark will be placed on each line containing the net of interest, as shown in Figure 3 .
A double click on the report file will cancel the bookmarks and highlighting of the node name in the SPICE file.
2.3: LVS Navigator
This options allows the user to search and inspect matched and unmatched nodes, discrepancies, and parameter errors listed in LVS reports. It is also possible to find the corresponding nodes in both netlists. If the node probing database of the Layout tool Expert exist and the second netlist was produced by a layout extraction, this tool option will also highlight the net in the Layout Editor tool Expert . Section 2.3.4: LVS Navigator and Chapter 3: Running Guardian LVS of the Guardian LVS User's Manual will provide more information on this feature and its use.
2.4: Node Walker
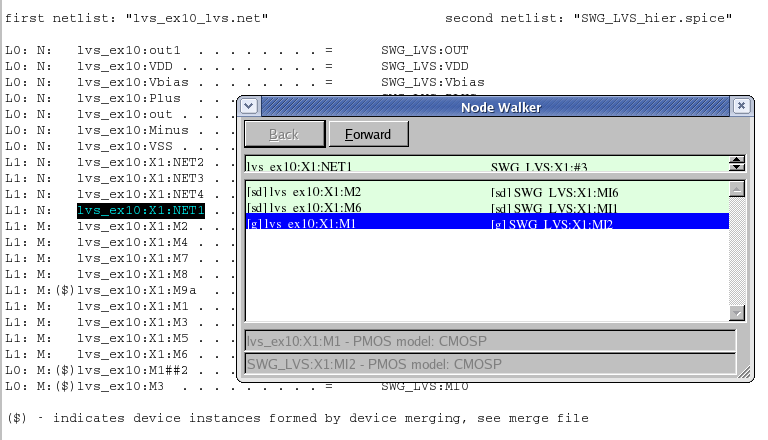
This option brings up a window titled Node Walker that will illustrate the neighboring list of nodes and the match or unmatch information for these nodes. The left side of the window presents the nodes from the first netlist, the second netlist nodes are presented in the other side. The match and unmatched information is color coded with green and red text. Double clicking a node name activates the neighboring list of this node in the Node Walker window. The Back and Forward button located at the top of the window are used to activate the previous and following neighborhood lists. Figure 4 illustrates this function.
2.5: Merge Hierarchy
This option will allow the user to display the information about merge and reduction for the selected hierarchical name in the Merge, Match, Unmatch, Parameter Error, and Parameter Match reports file.
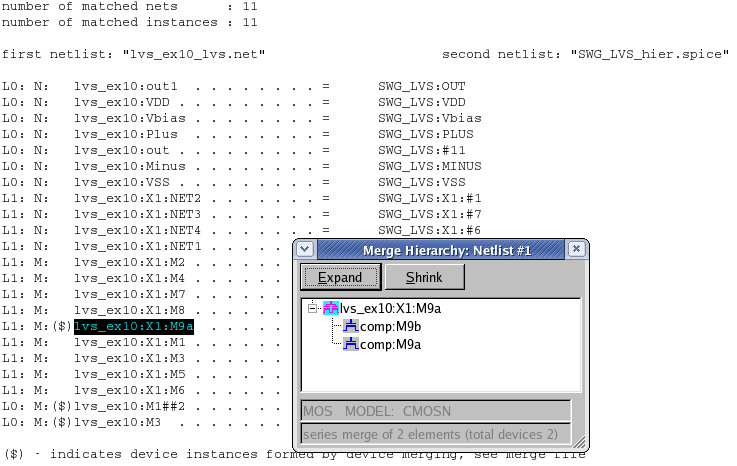
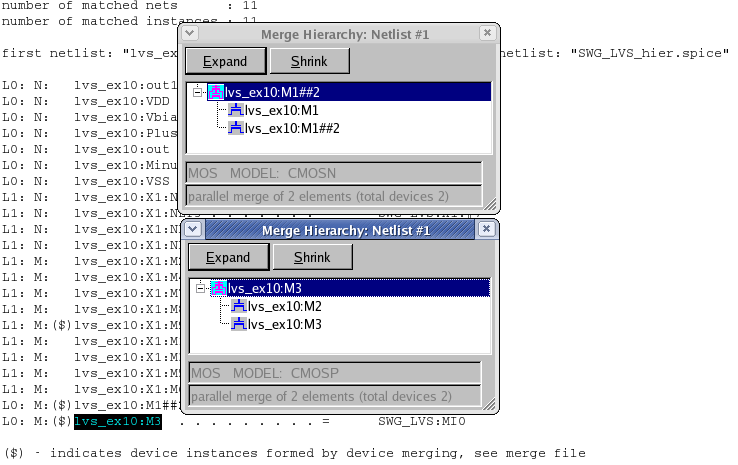
When double clicking on a net and selecting this option in the Action upon Double Click dialog, the Merge Hierarchy panel will open and display the hierarchy as a merge tree. Figure 5 illustrates this panel. An icon next to the names of the devices illustrates the type of merge/reduction (series, parallel). The bottom of the window also specifies the type.
If the user double clicks on a hierarchical name in the Match, Unmatch, Parameter Error or other reports and this name is not the results of a merge or reduction operation, the message The object is not formed by reduction or merging will be displayed.
The Shrink and Expand button in the Merge Hierarchy panel will modify the level of detailed display.
2.6: Instance-Subcircuit Information
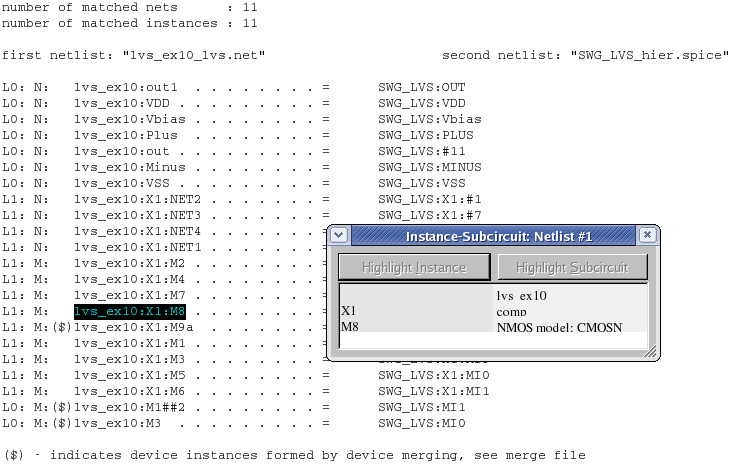
This is a tool for representation of hierarchy of a selected node name in Filter, Match, Unmatch, Parameter Error or Parameter Match reports.
The Instance-Subcircuit dialog shows information of hierarchy for the selected device or net. The information represents a name sequence of subcircuit instances that belong to subcircuits of upper hierarchical levels, starting with the device or net name. The dialog has two columns that contain names of instances and names of subcircuits that correspond to these instances (see Figure 6 ).
2.7: Net Hierarchy
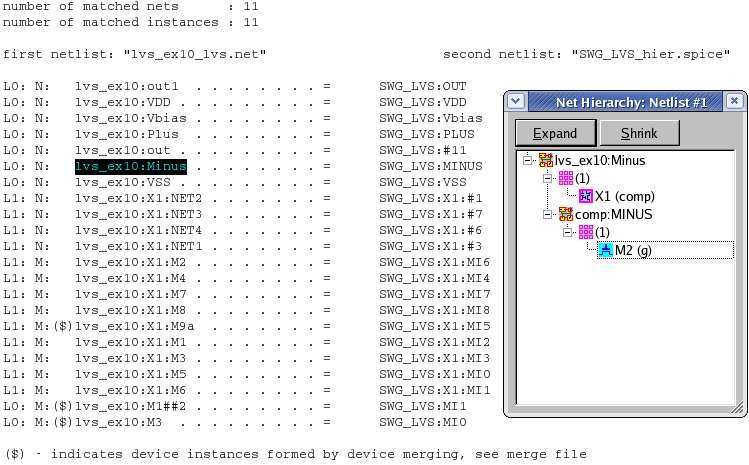
This is a tool for representation of hierarchy of a net. This tool can be loaded from the Match and Unmatch reports. You can see how a net spreads from the top level of this net into the subcircuits of lower levels.
The Net Hierarchy dialog contains a tree representing the net hierarchy (see Figure 7 ). The top vertex of the tree corresponds to the top level of the net. The sons of a tree vertex involve the information about the number and names of instances connected to this net. The names of subcircuits corresponding to these instances, and the names of device terminals, are given in parentheses.
3.0: Experimenting with Guardian LVS Inspection tools
Once all the example files have been downloaded and the preliminary steps describes in 1.0 are completed the user can follow the instructions below:
- After completion of the LVS run, open the match report ( MA ), by either clicking on the MA icon located in the Window toolbar or by choosing the menu Window->Match File
- Once the match file report opens, double click on the net "lvs_ex10:X1:NET1" located on the left column of the report. The Action upon Double Click window should open as shown in Figure 1 .
- In this window select Connectivity Traversing and press OK . This opens the NET1 Connections window as shown in Figure 2 . If you double click on "[g] lvs_ex10:X1:M1" a second window titled M1 Connections illustrates the connectivity for the gate of M1.
- Close the two popup windows and double click again on the net "lvs_ex10:X1:NET1". This time select the option Netlist File Highlighting and press OK . This will open the netlist #1 and highlight the net selected as shown in Figure 3 .
- Close the netlist #1 window and double click one more time on the net "lvs_ex10:X1:NET1". When the window opens, select the option Node Walker and press OK . The Node Walker window will open as shown in Figure 4 . Double click on the "[g] lvs_ex10:X1:M1" on the left side, this will give you the information for this net.
- Close the Node Walker popup window, and double click on the net "lvs_ex10:X1:M9a" located on the left of the match report file. Then select the option Merge Hierarchy , this will open a popup window as shown in Figure 5 . Press Expand to get more detail on the series merge that took place during the LVS comparison.
- Close the Merge Hierarchy popup window. The user can repeat the Merge Hierarchy option by selecting other nets like: "lvs_ex10:M1##2" or "lvs_ex10:M3". The results are shown in Figure 5a .
- Close the popup window and double click on the net "lvs_ex10:X1:M8" and select the option Instance-Subcircuit Information and press OK . This will open a new window as shown in Figure 6 .
- Close this popup window and double click on the net "lvs_ex10:Minus" ans select the option Net Hierarchy and press OK . This will open a new window as shown in Figure 7 . Press Expand to get all the tree details.
To learn more about these inspection tools the user can read Chapter 7 of the Guardian LVS User's Manual ( guardianlvs_users1.pdf ) located in /lib/guardian/4.8.36.R/docs of the Silvaco tool installation area.