007_size_edge : Transform Edges into Rectangles
Minimum Required Version
: Expert 4.14.0.R, Guardian 4.14.0.R
Syntax
   SIZE_EDGE: Layer=< layer >, {In | In_Factor} = < NIn >,
              [{Out    | Out_Factor}    = < NOut >,]
              [{Extend | Extend_Factor} = < NExt >,]
              LayerR=< layer2 >;
-
Layer
- is the parameter identifying the input layer name.
-
*_Factor
- Means that the numeric parameter is the factor by which the edge length
must be multiplied to obtain the actual sizing parameter.
-
In
- Specifies the amount of expanding the edge in the "inside" direction.
This parameter must be nonnegative.
-
Out
- Specifies the amount of expanding the edge in the "outside" direction.
This parameter must be nonnegative.
- Extend - Specifies the amount of elongating the edge from both sides. This parameter may be negative, meaning edge contraction.
The example1 demonstrates how to expand/elongate the edge in the specific direction.
To run the example1:
1) Start
Guardian DRC
or
Expert
.
2) Load the
"size_edge.eld"
file (
File->Open
)
3) Open the
size_edge1
cell.
4) Load the
size_edge1.dsf script from the Script panel. (
Verification->DRC->DRC script panel
)
5) Run DRC. (
DRC->Run
)
Description of
size_edge1.dsf
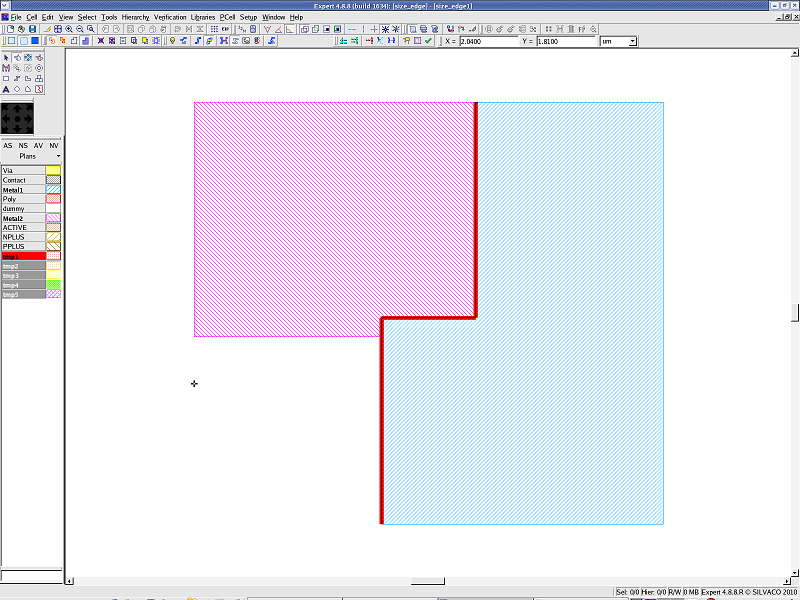
Line1 : The tmp1 object is created from the object of Metal1 and Metal2 by the SELECT_EDGES command. (See select_edges.png )
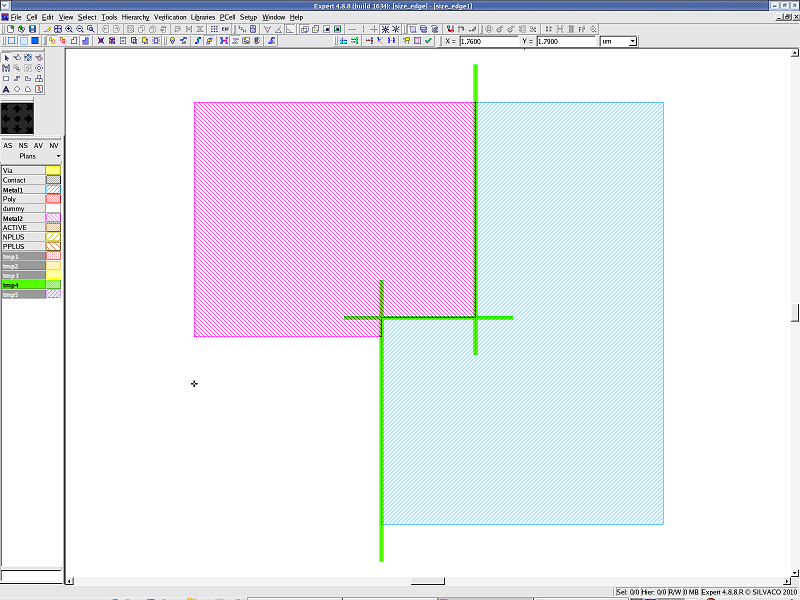
Line2 : The edge of the tmp1 object is expanded in the inside direction by the SIZE_EDGE(In) command and the tmp2 object is created. (See size_edge_In.png )
Line3 : The edge of the tmp1 object is expanded in the outside direction by the SIZE_EDGE(Out) command and the tmp3 object is created. (See size_edge_Out.png )
Line4 : The edge of the tmp1 object is elongated from both sides by the SIZE_EDGE(Extend) command, and the tmp4 object is created. (See size_edge_Extend.png )
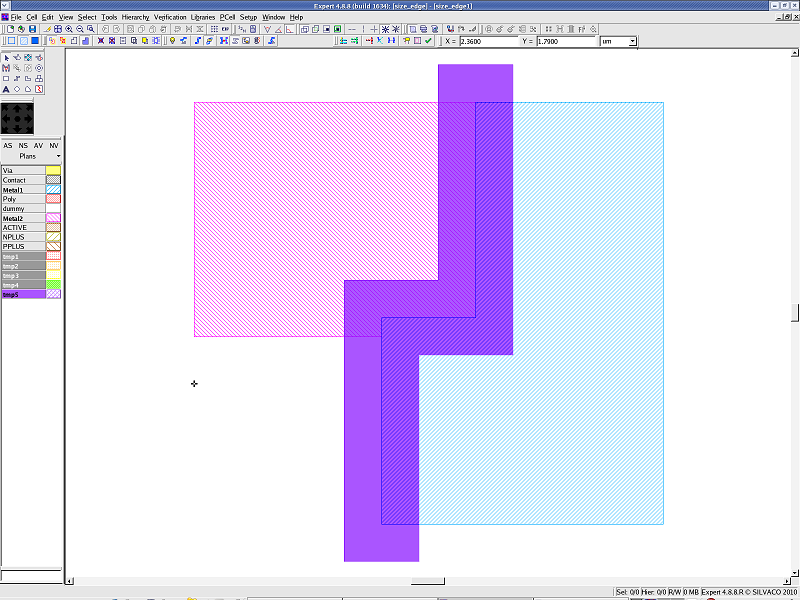
Line5 : The edge of the tmp1 object is expanded in the inside and outside directions by the SIZE_EDGE(In,Out) command, and its edge is elongated from both sides by the SIZE_EDGE(Extend) command, then the tmp5 object is created. (See size_edge_In_Out_Extend.png )
Example2 is a usage example of the SIZE_EDGE command.
To run the example2:
1) Start
Guardian DRC
or
Expert
2) Load the
"size_edge.eld"
file (
File->Open
)
3) Open the
"size_edge2"
cell.
4) Load the
size_edge2.dsf script from the Script panel. (
Verification->DRC->DRC script panel
)
5) Run DRC. (
DRC->Run
)
Description of
size_edge2.dsf
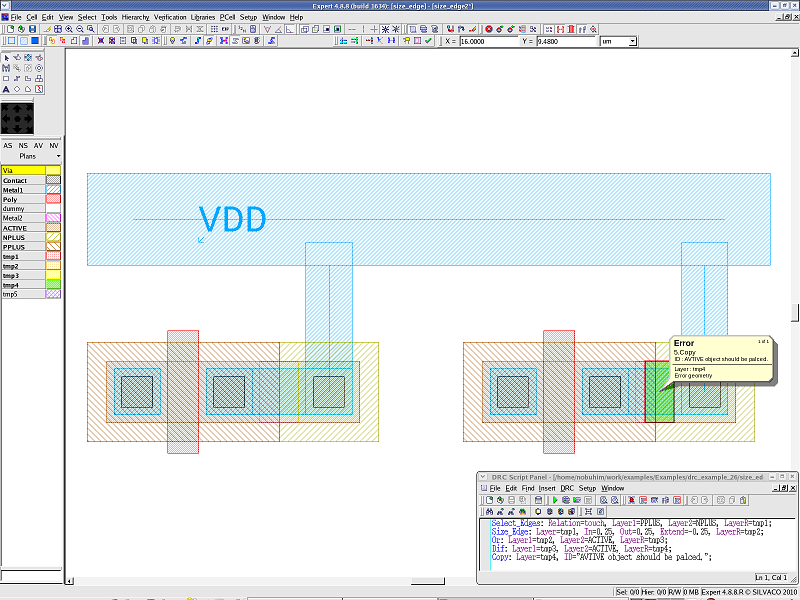
Line1 : The tmp1 object is created from the object of PPLUS and NPLUS by the SELECT_EDGES command.
Line2 : The edge of the tmp1 object is expanded by 0.25 microns in the inside and outside directions, and are shortened by 0.25 microns from both sides. The tmp2 object is created.
Line3 : The tmp3 object is created from the logical sum of the tmp2 object and ACTIVE object.
Line4 : The tmp4 object is created from the difference between the tmp3 object and ACTIVE object.
Line5 : The Error Database (EDB) is created from the tmp4 object by the COPY command. Once the EDB file is loaded, you can confirm the DRC errors, See drc_error.png .
To learn more about Guardian DRC , the different command and their syntax as well as the different setup options, see the Guardian DRC user manual "guardian_users1.pdf" located in lib/expert/4.14.0.R/docs/ in your installation area.
size_edge1.dsf
											Select_Edges: Relation=touch, Layer1=Metal1, Layer2=Metal2, LayerR=tmp1;
Size_Edge: Layer=tmp1, In=0.2, LayerR=tmp2;
Size_Edge: Layer=tmp1, Out=0.2, LayerR=tmp3;
Size_Edge: Layer=tmp1, Extend=0.2, LayerR=tmp4;
Size_Edge: Layer=tmp1,In=0.2, Out=0.2, Extend=0.2, LayerR=tmp5;
size_edge2.dsf
											Select_Edges: Relation=touch, Layer1=PPLUS, Layer2=NPLUS, LayerR=tmp1;
Size_Edge: Layer=tmp1, In=0.25, Out=0.25, Extend=-0.25, LayerR=tmp2;
Or: Layer1=tmp2, Layer2=ACTIVE, LayerR=tmp3;
Dif: Layer1=tmp3, Layer2=ACTIVE, LayerR=tmp4;
Copy: Layer=tmp4, ID="AVTIVE object should be palced.";